
Cracks, dents, and holes in your walls can make any room look worn and neglected. Whether you’re dealing with accidental damage or settling issues, fixing drywall is an essential part of maintaining your home’s appearance and value.
Planning a successful drywall repair project in Winchester means understanding the scope of the work, gathering the right materials, and knowing when to call in professional help. This step-by-step guide will help you make smart decisions from start to finish.
Assess the Damage to Your Walls
Before you buy a single tool or roll of tape, take time to inspect every damaged area carefully. Walk through your home and note the location, size, and type of each issue. Small nail holes are very different from wide cracks or water-damaged sections.
Look for signs of deeper problems like mold, moisture stains, or structural movement. If the drywall feels soft or crumbly, or if you see dark stains or a musty smell, the damage may extend behind the surface. These situations usually require professional evaluation before any repair begins.
Measure each damaged spot and take photos if it helps you remember details. This information will guide your material list and help you estimate how much time the project will take.
Decide Which Repairs You Can Handle Yourself
Not every drywall repair project in Winchester needs a contractor. Simple fixes like filling nail holes, patching small dings, or covering minor screw pops can be DIY-friendly if you have a few hours and basic tools.
However, larger holes, ceiling damage, textured finishes, or repairs that involve cutting and fitting new drywall panels demand more skill and specialized tools. Matching existing textures, feathering edges for invisible seams, and ensuring a perfectly smooth, paint-ready surface takes practice and patience.
Consider your own skill level honestly. A botched repair can cost more to fix later than hiring a professional from the start. If the damaged area is visible in a main living space or if you’re preparing the home for sale, flawless results matter even more.
Gather the Right Materials and Tools
Once you know what you’re fixing, make a complete list of supplies before you visit the hardware store. Running out of joint compound halfway through a repair disrupts your workflow and can affect the quality of your finish.
Essential Materials for Most Repairs
- Joint compound (also called mud) for filling and smoothing
- Drywall tape (paper or mesh, depending on the repair)
- Sandpaper or sanding sponges in fine and medium grits
- Primer to seal the repaired area before painting
- Patching material (drywall scraps, repair kits, or backing boards for larger holes)
Tools You’ll Likely Need
- Putty knives and taping knives in various widths
- Utility knife for cutting tape and trimming edges
- Drywall saw if you’re cutting out damaged sections
- Dust mask and safety glasses
- Drop cloths to protect floors and furniture
If you’re tackling a larger repair, you may also need drywall screws, a drill, and a T-square for accurate cuts. For professional-level results on complex jobs, our drywall repair service brings all the specialized tools and materials to every project.
Prepare the Work Area and Schedule the Job
Drywall repair creates fine dust that travels farther than you expect. Move furniture away from walls, cover floors with drop cloths, and close doors to other rooms. If you’re sanding, consider sealing off HVAC vents in the work area to keep dust from spreading through your home.
Plan your timeline carefully. Joint compound requires drying time between coats, and rushing this step leads to cracking and poor adhesion. Small repairs might take a day or two when you account for drying, sanding, priming, and painting. Larger projects can stretch over several days.
Winchester’s seasonal humidity can affect drying times, especially in basements or poorly ventilated rooms. Good airflow and moderate temperatures help compound cure properly. Avoid starting repairs during rainy weeks if your workspace tends to hold moisture.
Understand the Repair Process Step by Step
Once your materials are ready and your workspace is protected, you can begin the actual repair. Each type of damage follows a slightly different process, but most jobs share a common sequence.
Clean and Prepare the Damaged Area
Remove any loose drywall, flaking paint, or crumbling edges around the damage. For holes, cut the damaged section into a clean square or rectangle. Ragged edges make it harder to create a smooth patch. Wipe away dust with a damp cloth so the compound adheres properly.
Apply Joint Compound in Thin Layers
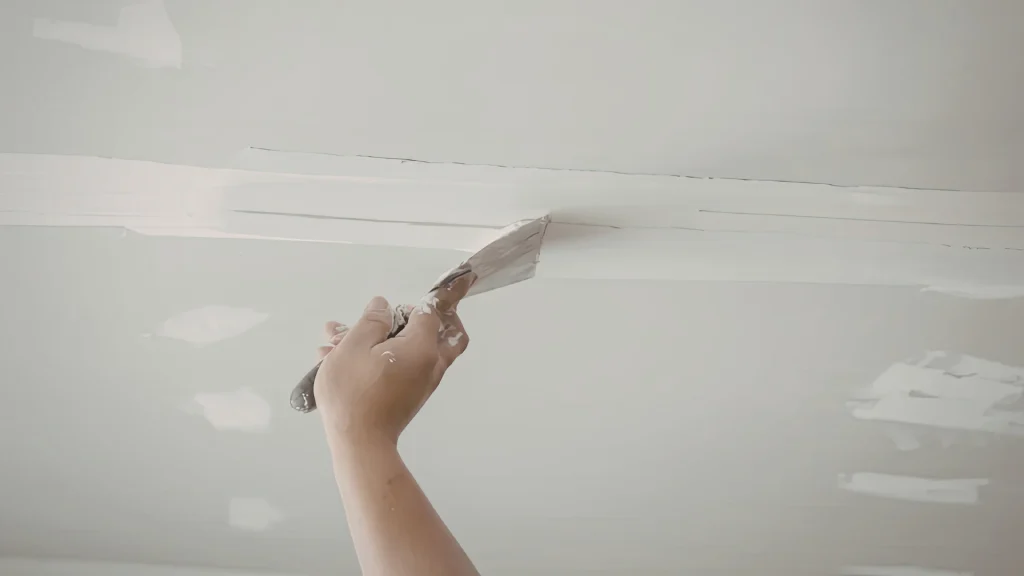
Spread a thin coat of joint compound over the repair area, pressing it firmly into cracks or over tape. Let it dry completely, then apply a second coat slightly wider than the first. This feathering technique blends the repair into the surrounding wall. Most repairs need at least two or three coats.
Sand Smooth and Prime
After the final coat dries, sand the surface gently until it feels flush with the rest of the wall. Wipe away all dust, then apply a coat of primer. Primer seals the fresh compound and prevents the repair from showing through your paint. Once the primer dries, the wall is ready for a finish coat that matches the rest of the room.
If you’re planning to repaint the entire room after your repair, our premium interior painting team can handle the final finish with meticulous prep work and flawless application.
Know When to Call a Professional
Some repairs look simple until you start working on them. If you discover mold, extensive water damage, or structural issues behind the drywall, stop and call a professional. These problems need proper remediation before any cosmetic fix.
Large holes, ceiling repairs, or damage in high-traffic areas also benefit from professional attention. Contractors have the experience to match textures, blend seams invisibly, and deliver a finish that looks factory-fresh. They also work faster, which matters if you’re on a deadline or preparing your home for guests or buyers.
If your repair connects to other projects like remodeling, painting, or wallpaper work, coordinating with one trusted contractor simplifies scheduling and ensures consistent quality across every surface.
Frequently Asked Questions
How long does a typical drywall repair project take?
Small repairs like nail holes can be finished in a few hours plus drying time. Larger patches or multiple damaged areas may take two to four days when you include compound drying, sanding, priming, and painting. Professional crews often complete the same work faster because they can apply coats efficiently and have industrial drying techniques.
Can I paint directly over repaired drywall?
No. Fresh joint compound is porous and will absorb paint unevenly, leaving visible patches. Always prime repaired areas first. Primer seals the compound, evens out texture, and ensures your topcoat looks uniform. Skipping this step is the most common reason repairs show through the final paint.
What causes drywall cracks to come back after repair?
Recurring cracks usually signal ongoing movement in the structure, like settling, temperature changes, or moisture issues. If you repair a crack and it reopens in the same spot, investigate the cause before patching again. Flexible caulk or mesh tape can help, but addressing the root problem is the only permanent solution.
Get Expert Drywall Repair in Winchester
Planning your drywall repair project in Winchester is the first step toward walls that look flawless again. If you need professional help, Home Solutions JC brings over 10 years of experience restoring walls to smooth, paint-ready perfection across Montgomery, Howard, and Anne Arundel counties.
We handle every repair with meticulous prep work, precision finishing, and the same care we bring to our work with builders, architects, and designers. Call us at 2272775010 or visit our contact page to schedule a free estimate. Let us help you restore your home’s beauty with true professional reliability.